

Welcome to the first part of a three part blog that takes you through connecting to an exchange based mailbox, consuming the contents, and securitising the application; This first instalment will concentrate on setting up the App registration within Microsoft Azure. Soooo. Lets Go.
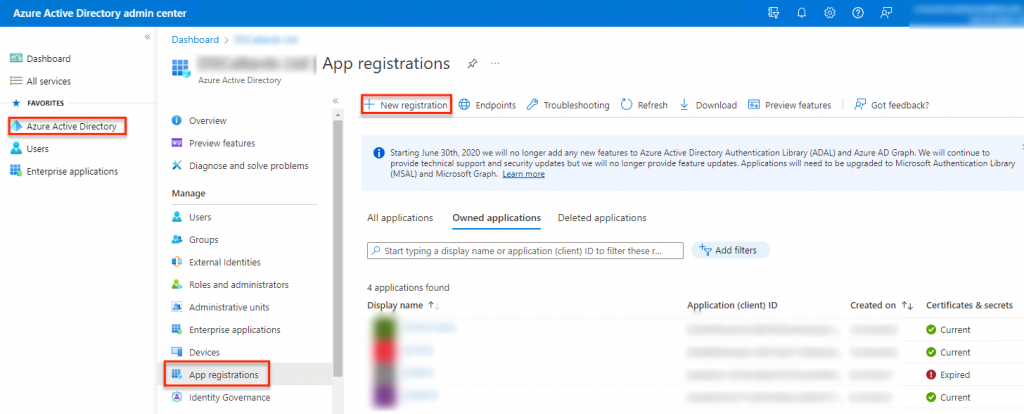
We thus first need to actually create our App Registration. So start by navigating to the URL https://aad.portal.azure.com. This will of course require you to log in to your Microsoft Work account, if not already done so. Permissions allowing you should then see a screen like the below. In this instance we want to first create the App Registration so after selecting the Azure Active Directory blade we then select ‘App Registrations’ and elect to add a ‘New Registration’
In my experience, with console apps and the like, the name is not at all important. The most important thing is that YOU know what it is should you ever need to come back and adjust settings (Which you will do). In this instance I have gone with the name EWSApplication and I wish to restrict this API to our organisation. Finally the RedirectURL is a setting that the original Microsoft document provided. In essence we don’t have a callback URL and so we specify that it is a Public Client (mobile and desktop) and we provide the Microsoft provided URL:-
https://login.microsoftonline.com/common/oauth2/nativeclient 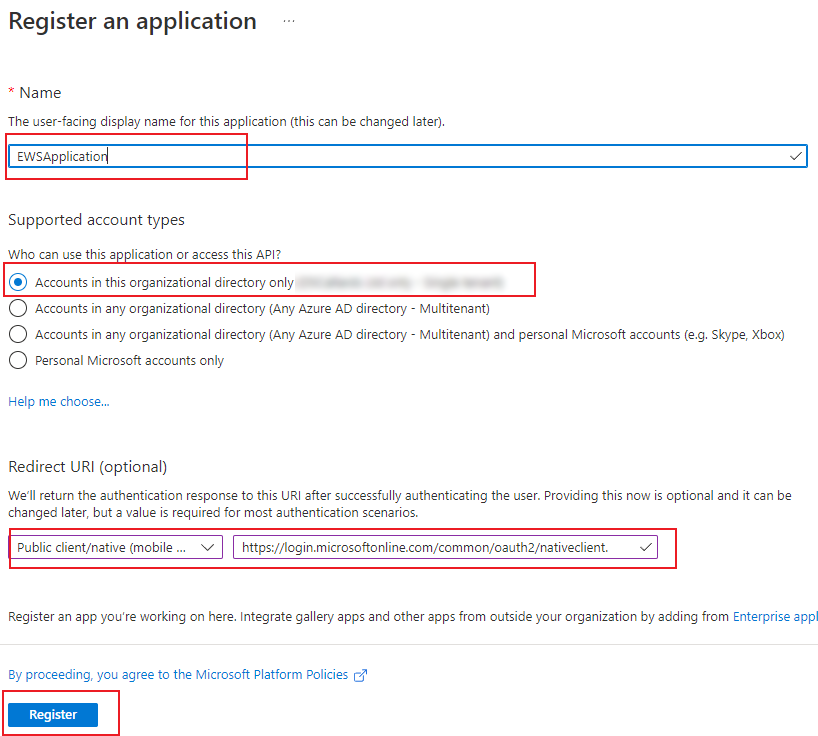
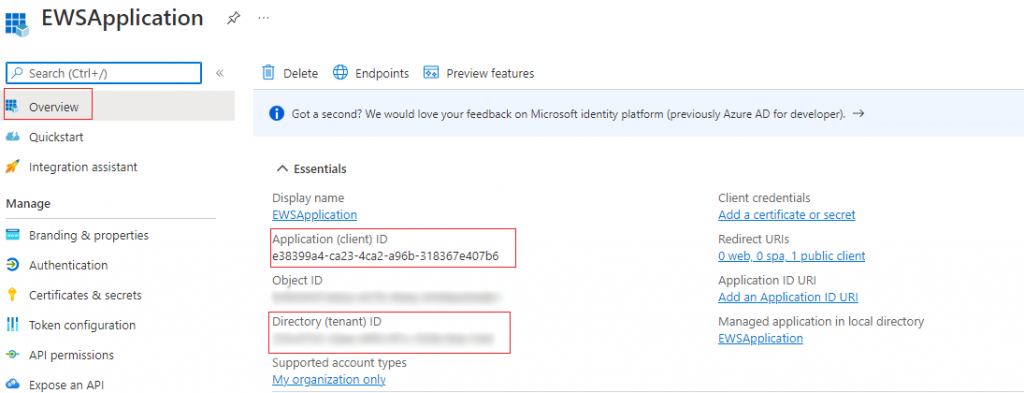
Once you are happy with the setting selected Register the App and you will be presented with a view of the App Registration that you have just created. Make a note of the Application ID and the Tenant ID as you will need both of these settings later.
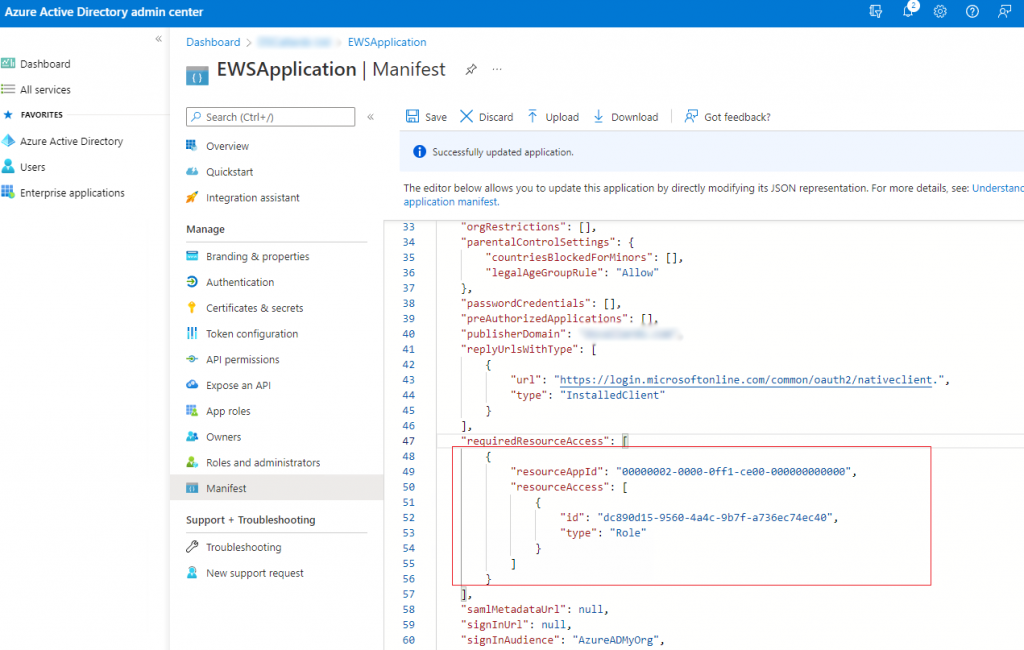
We then have a few more things that we need to set up before our registration is complete and ready to use. First off we need to be able to connect our application to the EWS system itself. This is done by adding the following JSON code to our manifest file.
{
    "resourceAppId": "00000002-0000-0ff1-ce00-000000000000",
    "resourceAccess": [
        {
            "id": "dc890d15-9560-4a4c-9b7f-a736ec74ec40",
            "type": "Role"
        }
    ]
}
After selecting the manifest you should scan through the code looking for the requireResouceAccess setting as shown below. The entire JSON specified above should be pasted into the setting between the square brackets that delimit the whole property object; This should replace the entire existing default setting that was created for us just now. Your manifest should read similar to this.
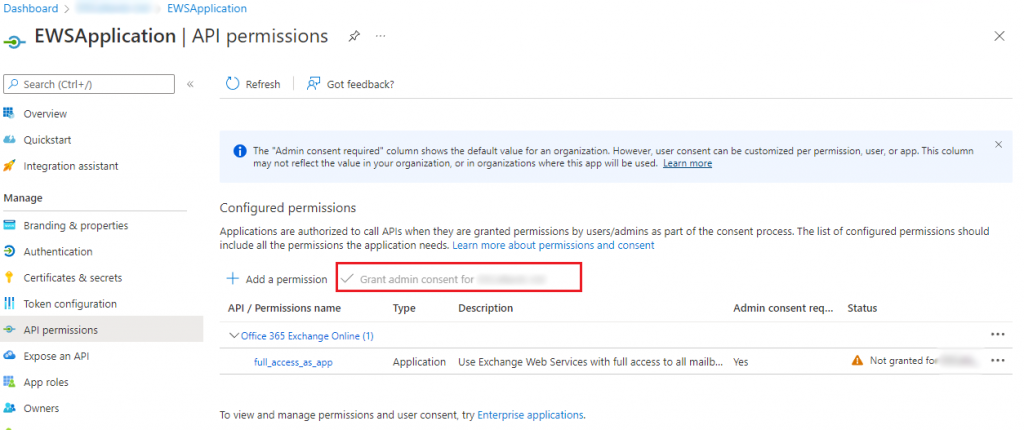
We then need to ensure the App Registration has permission to run. As we have previously said in the first instance this will give access to all email account within your organisation. We will of course correct this at a later time. Assuming you have permission there should be a ‘Grant admin consent for xxxxx.com’ button that you can press. Upon pressing this the app registration will be live and available to use.
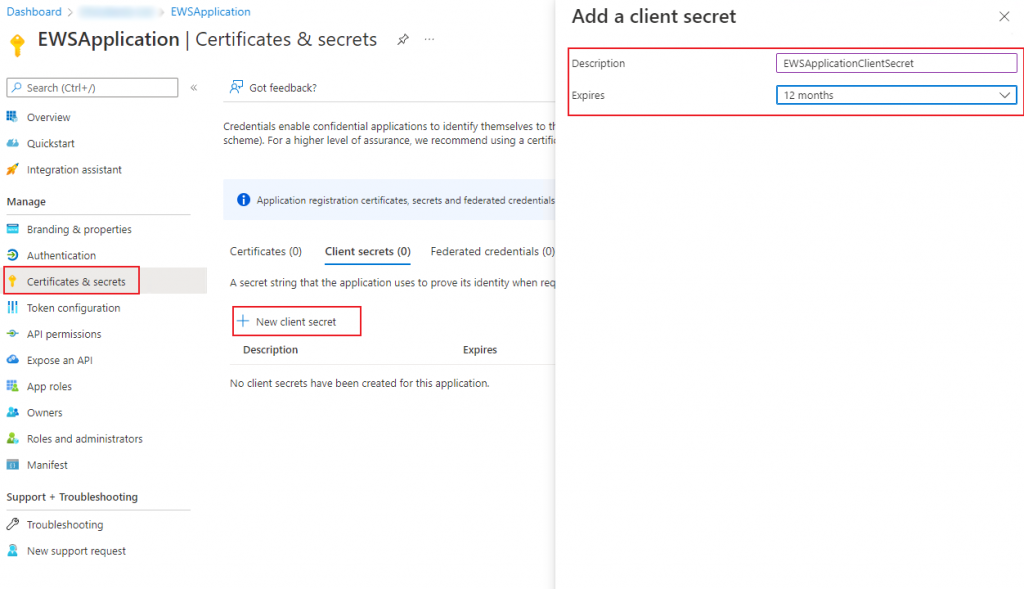
It will not however be accessible to the outside world just yet. We instead need to create a client secret that will allow Azure to know that the calling application has the knowledge required to be granted access to the system. Certificates could also be used but that is beyond the scope of this post. Instead we elect to create a ‘New client secret’ We are asked for a Name and an expiry date. I have given this key a 12 month expiry date in this instance
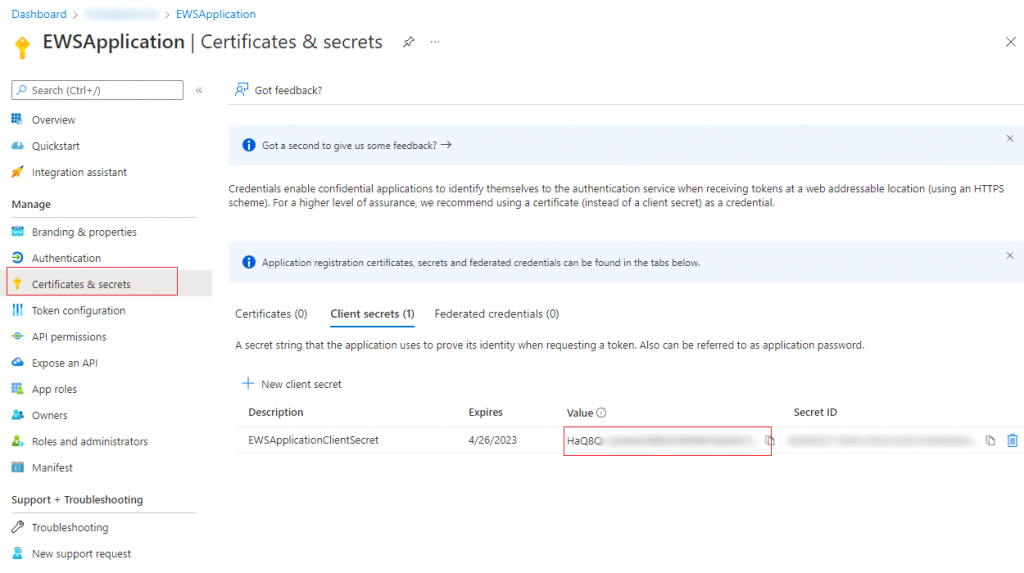
Upon creating the client secret you will be presented with the following very important screen. This screen will only ever be shown to you once and so you must take your opportunity to save the ‘Value’ of your client Secret as this too will be required by the service application. Please ensure that you use the Value and not the Secret ID which is useless to you.
Once you have got to here you should be ready to write some code and test that you can indeed connect to the EWS web service and retrieve emails from the mail account that you are interested in. Please follow that blog here.
2 comments