

Whilst coding a custom component for a complex SAP Design Studio Dashboard I was vaguely aware that coding one property per required column property was not exactly what you’d call, scalable! What I needed was to be able to capture arrays of data instead of just single properties, that way I could just have iterative code in the component which would take care of my component generation instead of these hardcoded single properties. In this instance I wanted to capture the colours for a given column header ( for a data table). In my situation I had 10 headers but as this is a customisable component I guess it would be better to express this as ‘n’ rather than 10. Despite posts to the contrary this is indeed made possible by use of the Array data type.
First we start with writing the property into the contribute.xml file. This is really the key to our issue and once this is correct the rest is really plain sailing. We start by writing the following property XML (I find the xml to be much easier than using the GUI) into our file:-
        <property id="columnColours" type="Array" title="Column Colours Array">
            <property id="arrayEntry" type="String" title="Column Colour">
            </property>
        </property>
The outer xml snippet entitled ‘columnColours’ creates an array to house the array data whilst the inner section entitled ‘arrayEntry’ details what I consider to be an array template/type definition for the type of data you wish to store; in this instance the type of data that we wish to store is a string value representing a colour value. Once this has been defined and the changes saved your array is nearly there. All that remains is to back this up with the accessor function to allow the Design Studio to inject your settings into the main body of the custom component .js file. This function is defined like any other accessor function, identical!
    this.columnColours= function(value) {
        if (value === undefined) {
            return columnColours_data;
        } else {
            columnColours_data = value;
            return this;
        }
    };
From here you can now access your property_data which instead of containing a primitive data type now contains an array of the type you defined. You can thus use iterative methods to access the values. Of course, you are all hardened professionals in the javascript world… You won’t do what I do and use pop/shift on the passed array and then wonder why subsequent redraws failed to work;-) That little problem I solved by cloning my source array using the very simple syntax to return an new shallow copy.
var newArray = sourceArray.slice(0);

//Magic happens here, EVERY TIME, not just first time!
Once your code has all been defined you can now run up the custom component in SAP Design Studio and if you look at the properties grid for your custom component you should see the new property there showing 0 entries. If you then click on the ellipsis to the right of the edit field you should be provided with a dialog similar to that below which allows you to specify the members of your array. Once you have defined your members your code should be good to go.
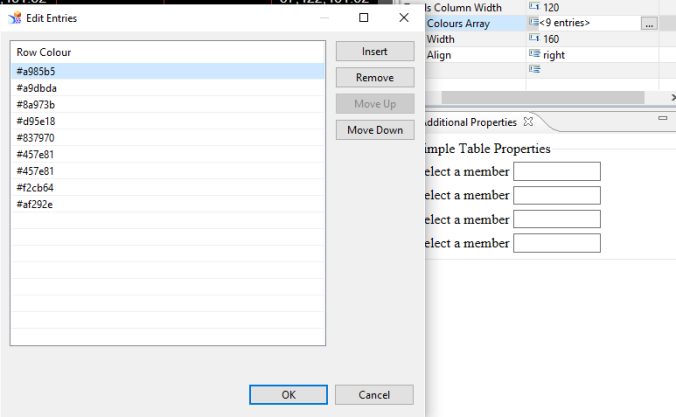
Far more scalable than 9 separate properties, I’m sure you’ll agree.
Go do it.