

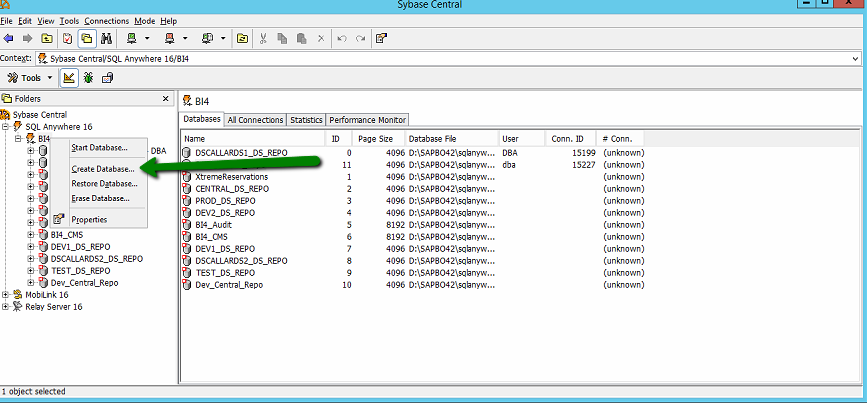
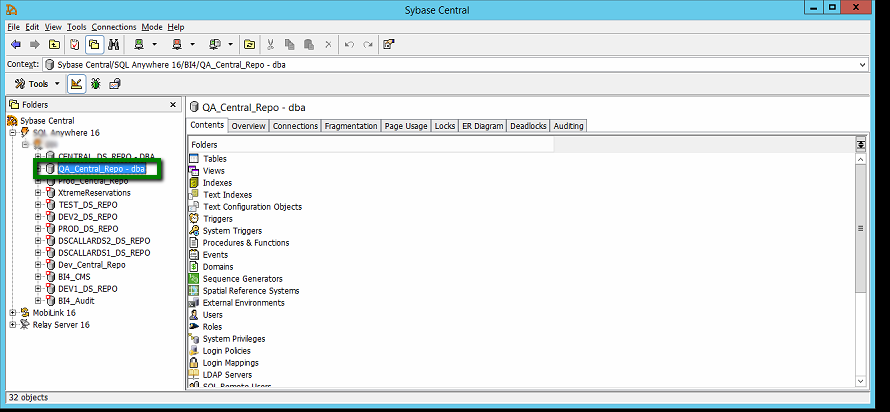
In part one of this blog we looked at why we might possibly want to configure separate repositories to control the processes for releasing an SAP Data Services job. My feeling is that it is better by far to have two central repositories, one for Development and one for QA. With this in mind I’m going to walk through from start to finish creating, in this case, our QA Repository. We are using SQL Anywhere for our repositories in this example, keep in mind that a repository is in fact just a database with a specific schema. So lets start by first creating a database by right clicking in the Sybase Central server window and electing to ‘Create Database…’
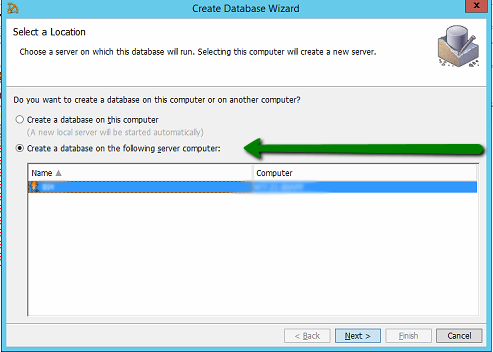
This will invoke the database wizard screen, there are FAR too many screens to go through in this blog, in the main I elected to go with the default settings with the exception of the following screens. In my instance I needed to create a database on a particular server.
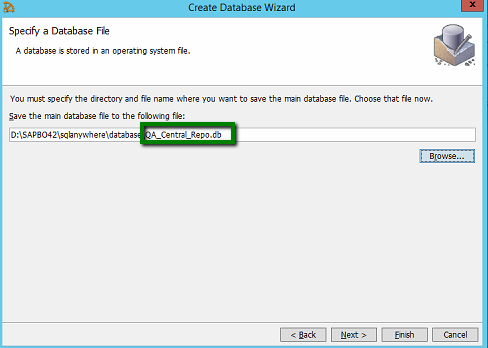
Note that I am creating the QA_Central_Repo.db file, a nice simple name that describes exactly what we are looking at.
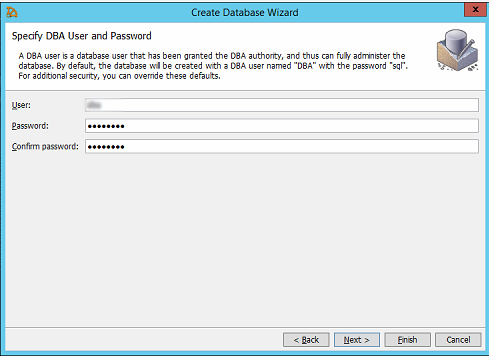
I then specified a user name and password for the new database.
Once we have been through all of the screens and selected the finish button we should see our new database there in Sybase Central ready for use
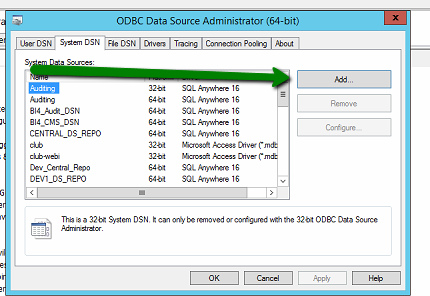
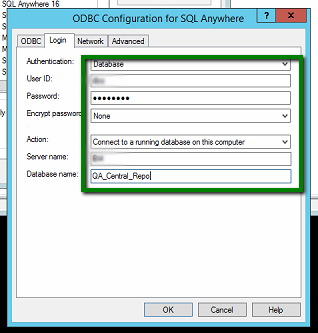
We then need to set up a 64 bit ODBC connection for our database to allow the various SAP data services to see our database, so after bringing up the 64 bit ODBC manager we press the add button:-
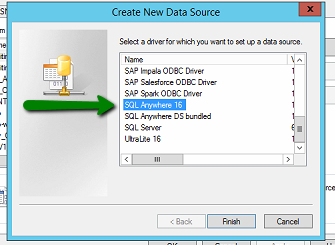
In this instance we select SQL Anywhere 16 as this is our database of choice
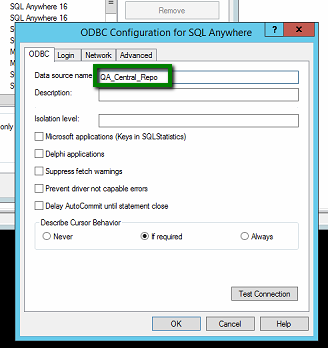
Next we need to configure the ODBC name so we’ll use something nice and logical, QA_Central_Repo the same as our database name.
And now configure the ODBC connection to point to our database, in this instance the database is running on the same server.
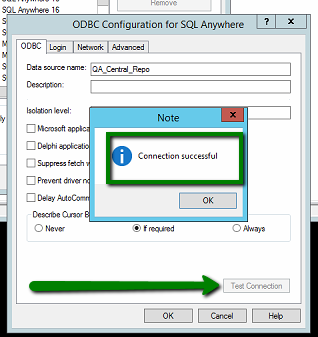
And before we move on from they step its always good practice to test that our ODBC connection is configured correctly by testing the connection, like thus. If it is configured correctly you should get a message box a little like this.
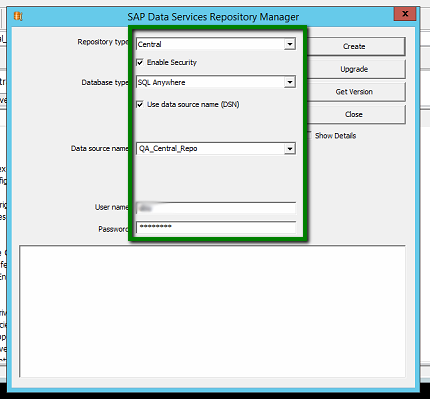
Right, thats it for the ODBC connection. Things are now getting a little bit more exciting than dull old databases and ODBC connections. You should have a program on your machine called the SAP Data Services Repository Manager. This application allows you create new repositories from empty databases and upgrade existing repositories to the latest version. If we then open this programme….

A very uninspiring dialog like the one below is displayed. What we want to do is to create a ‘Central’ repository from our QA_Central_Repo database and so we configure the screen as below. Two important points to note:-
- We must ensure that the tick box ‘Enable Security’ is ticked as this is what gives us a ‘Secure Repository’.
- We are using the ODBC DSN to connect to the repository.
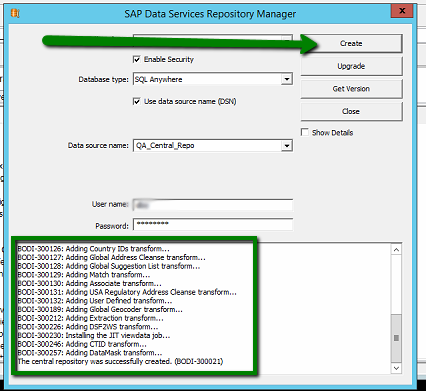
Once you are happy that you have entered the correct information press the create button and the Data Services Application will run a little magic and create the required schema to turn this database into an SAP Data Services repository.
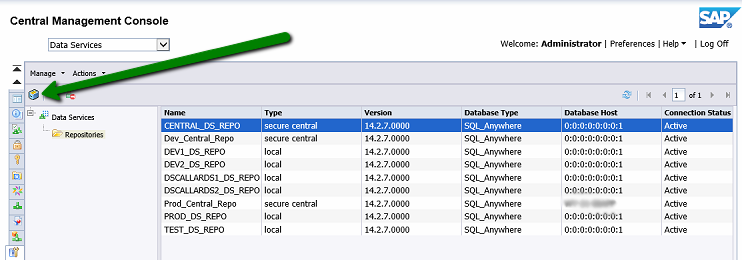
That was nice and simple, I bet you think we’re all ready to go now…. Well no, we now need to link the repository into the Data Services infrastructure which we do via the SAP Central Management Console, most often referred to as the CMC. We load the CMC up and then select the Data Services item from the dropdown list. This will display the infrastructure associated with the data services functionality. In this case upon selecting the ‘Repositories’ folder on the left you can see a list of available repositories to the right of the screen. What we need to do is to add our repository to this list, this we achieve by use of the button indicated by the green arrow
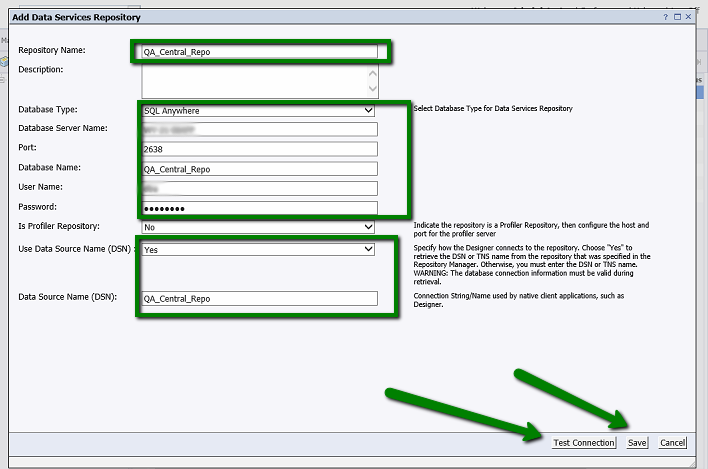
This will display the following form to allow you to adopt our new repository into the infrastructure. As you can see we specify the name of the repository and all of the relevant connection details, we also specify a ODBC DSN and then before we save the details we test to make sure that the details are entered correctly and that the repository can be contacted.
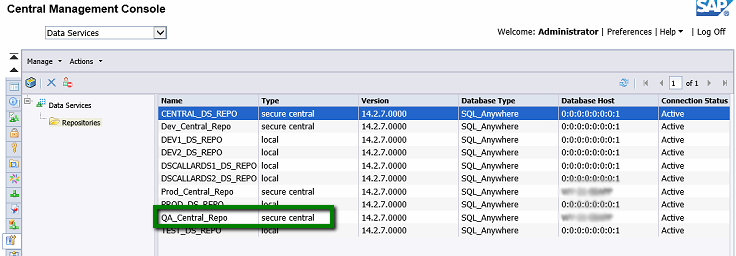
As you can see below once we press the ‘Save’ button our new repository is added to the list of those available, note that it is a ‘Secure Central’ repository which is exactly what we intended.
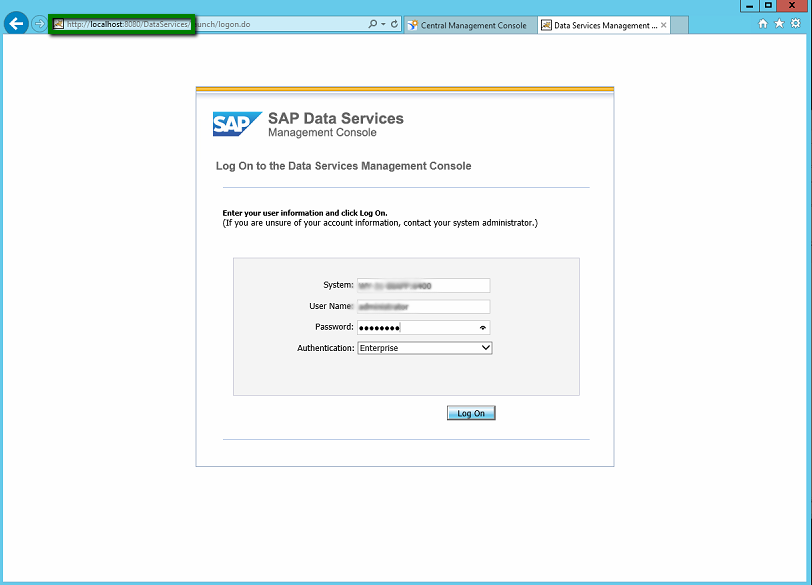
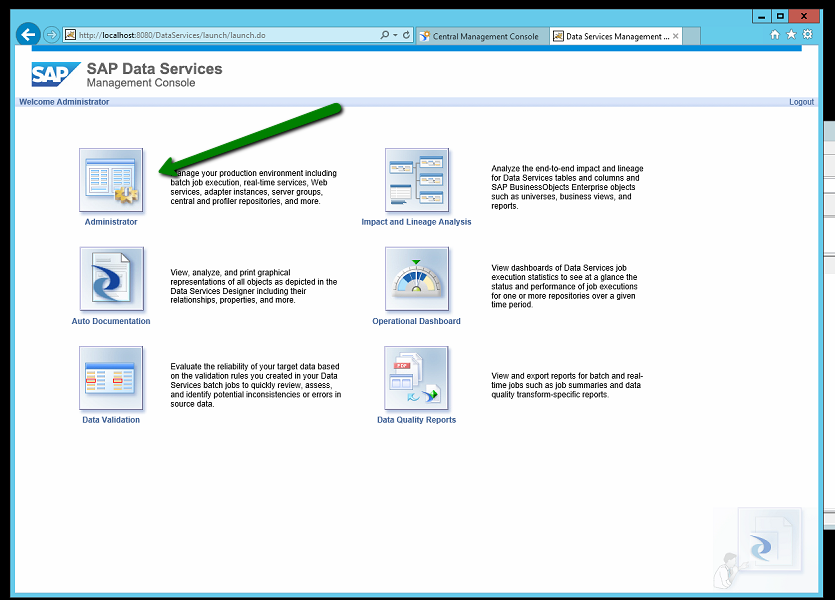
Hand on heart, I promise you we are nearly there but we do have one more job to do before we can initialise the awesome. If you try and connect your local repository now to this ‘Central Repository’ upon activating you will get a message saying that the repository cannot be activated due to user permissions, I’m paraphrasing… don’t shoot me. What we therefore need to do is to associate relevant users with the repository. What we therefore need to do is to log into the ‘Data Services Management Console’ commonly known as ‘DSM’. The url is enclosed in the green rectangle below
Once you have logged in, using your SAP administrator logon you should see the following page, we need to access the ‘Administrator’ functions as indicated below and so upon clicking on this :-
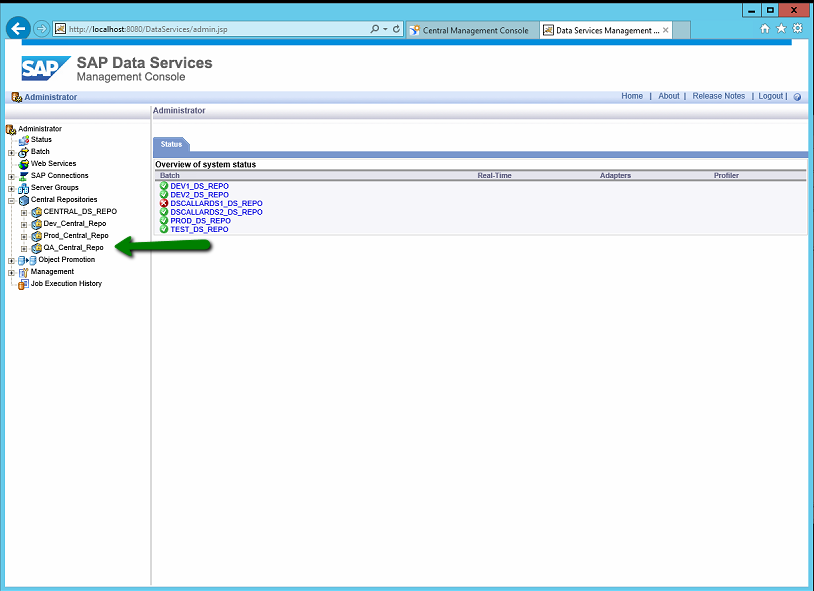
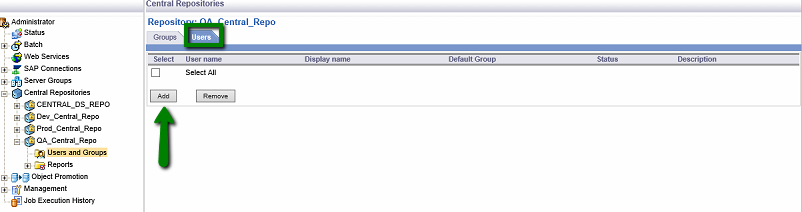
You should see a screen like this, If you open the ‘Central Repositories’ node you will see all of the available central repositories. In this instance we want to select the QA_Central_Repo as indicated.
We then select the ‘Users and Groups’ sub node and within the groups node I need to add a group (you cannot have a user without a group). SAP enforce group policies which is a good thing.
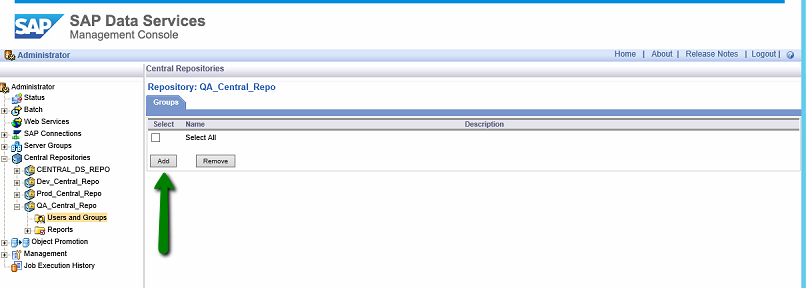
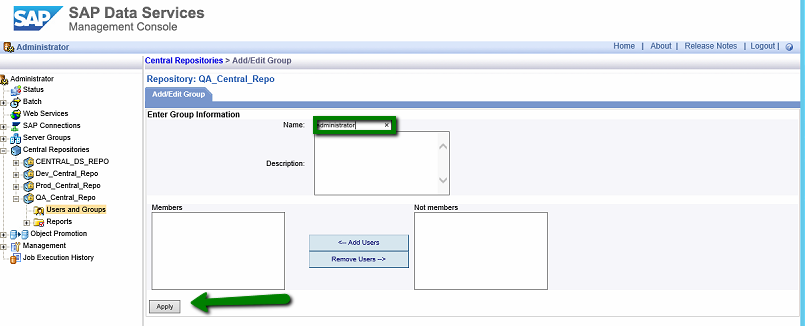
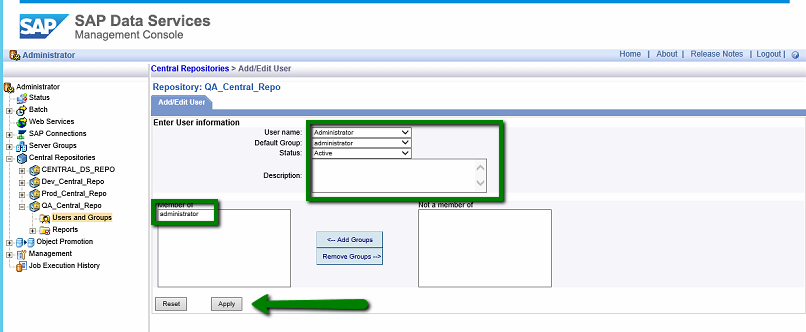
Rather simplistically, because I am a simple beast I create an administrators group as below and press the ‘Apply’ button, don’t worry about there being no users for a second…
I can then select the ‘Users’ tab to the right of the ‘Groups’ tab and again I press ‘Add’
You should now be able to select a user from the list of SAP users and then assign groups to them. We need to make sure that in this case they are a member of our ‘administrator’ group (or whatever you called it) that we just created
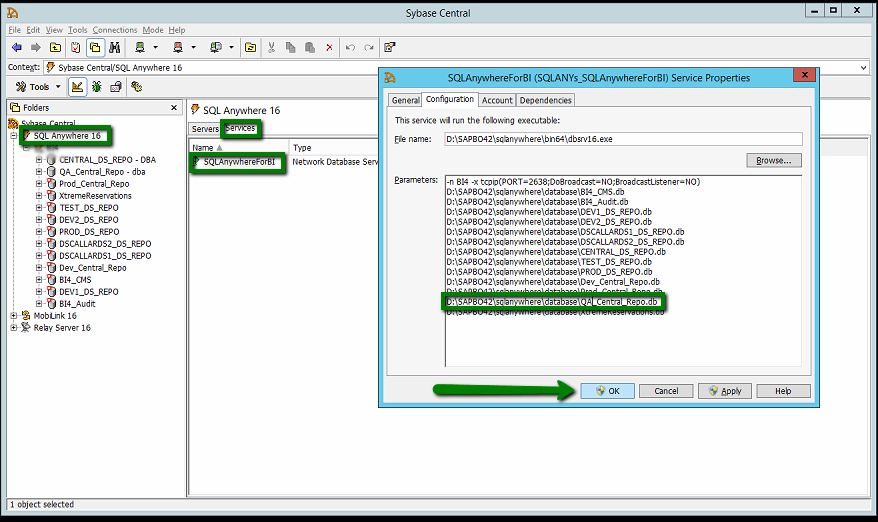
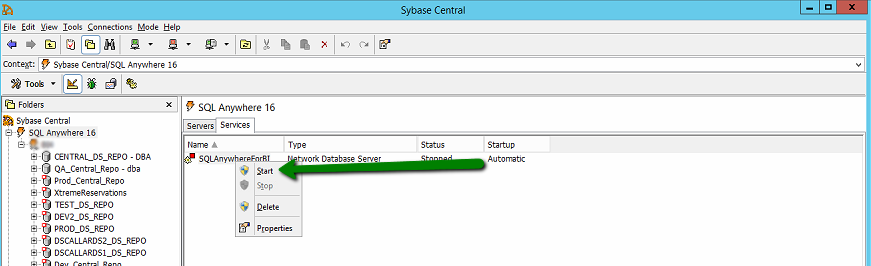
And there we have it, all done except for one tiny job which is because we are using SQL Anywhere. We need to ensure that the repository is mounted when the service starts. We thus add a line pointing to our repository and save the changes.
Before stopping the ‘Server Intelligence Agent’ in the central configuration manager (which has hooks into the database service)
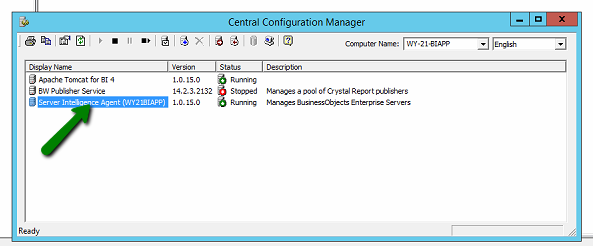
We can then Stop and restart our SQL Anywhere Service, and then restart the ‘Server Intelligence Agent’
Well done for bearing with us through this process, you should now have a properly functioning SAP Data Services Central Repository. Obviously you need to do this for EACH central repository you want to set up, so ….. good luck. In part 3 of this blog we show how these repositories can be used in the development and release cycle.