

In the previous two blogs we looked at first, how to structure your repositories for the release cycle and secondly how to create your central repositories so that they work seamlessly with your local repositories.
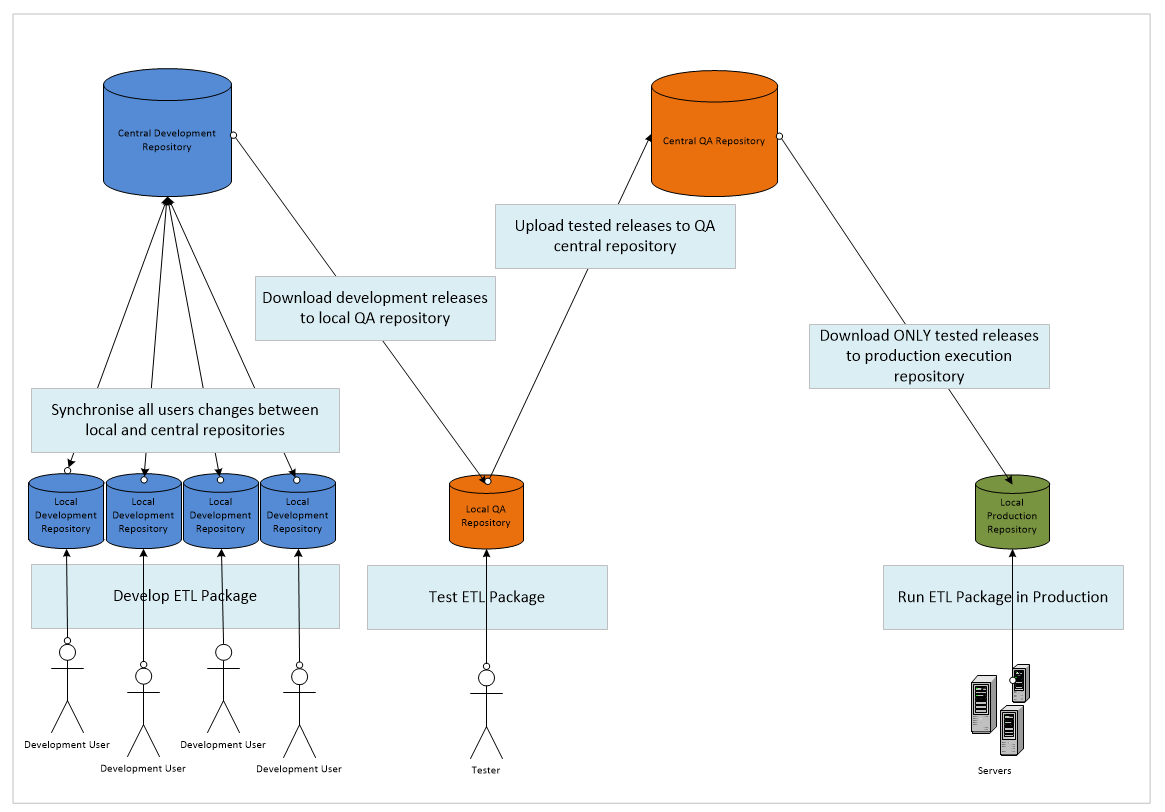
If you take a look at the diagram below you’ll see exactly how the repositories sit together in the full release cycle. We start towards the left with the development users working on code, synchronising their changes through the Central Development Repository, refactoring until the point that the team are ready to make a release as a whole. The release can then only be made via the central repository, the QA user(s) download the latest version of the ETL package to their local QA Repositories. From here the package will be tested in isolation from the development team. Once the two teams have, between them, arrived at a candidate release that is ready to be released into production the QA team will upload the tested candidate; they will do this from the release source residing within their local QA repository into the Central QA Repository. From this point forward the ops team will have at their disposal the latest code which they may roll into production by downloading it into the local production repository(s), the central repository that they connect to will not see any of the intermediate releases and so they cannot mistakenly grab a partial implementation. They may then set up schedules against this code base to automate the process of running live data captures.
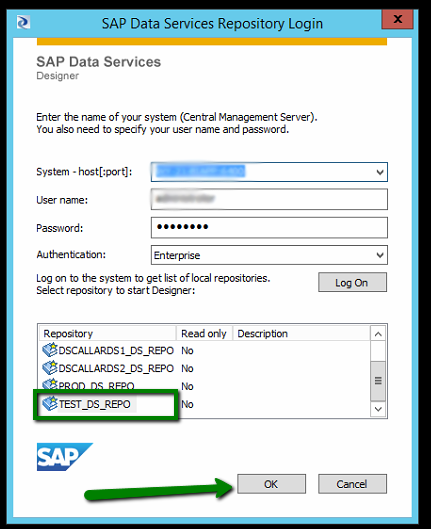
This blog will demonstrate how to use the repositories to move data from one ecosystem (development) into another (QA) and make the resultant tested code available for the production Ecosystem. We start with the development team having made a candidate release available to the QA department. As a member of the QA team I would then open my local repository in Data Services
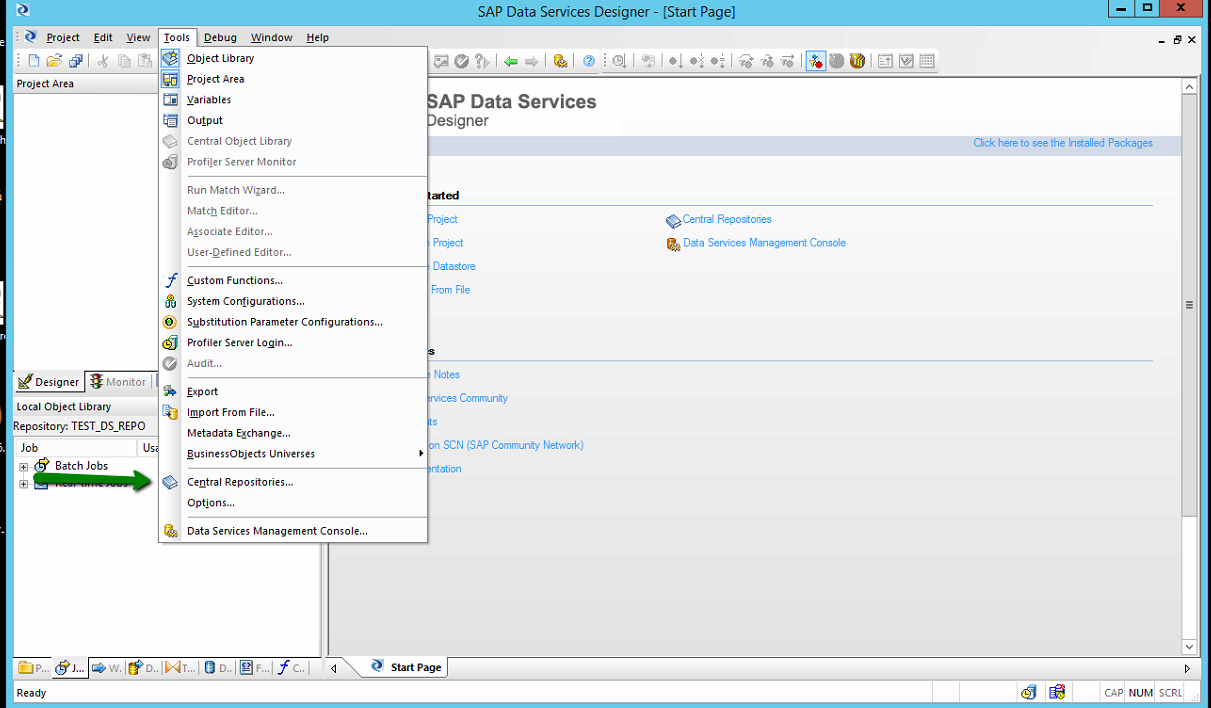
As this is a first release of the ETL Package in question if we look underneath our batch jobs you should see that we do not currently have the job within our repository. We therefore need to download the source from the central repository. In this instance we have not yet associated our central repository to our Data Services local repository and so we must do this before we go any further, we thus select the ‘Central Repositories…’ menu item from the tools menu.
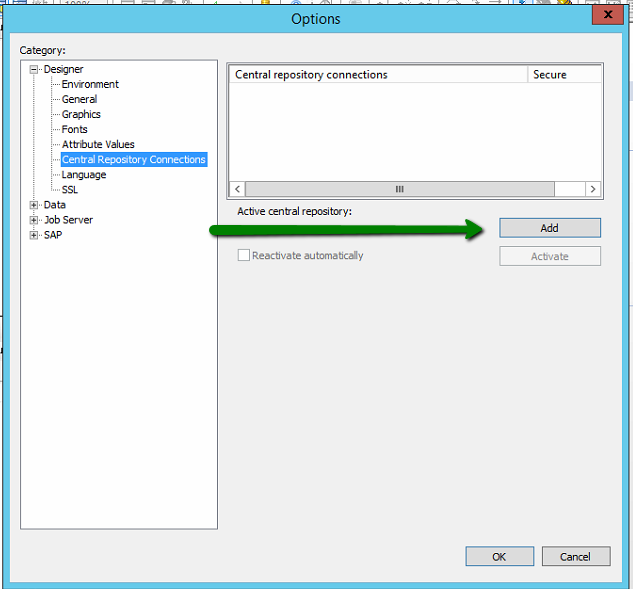
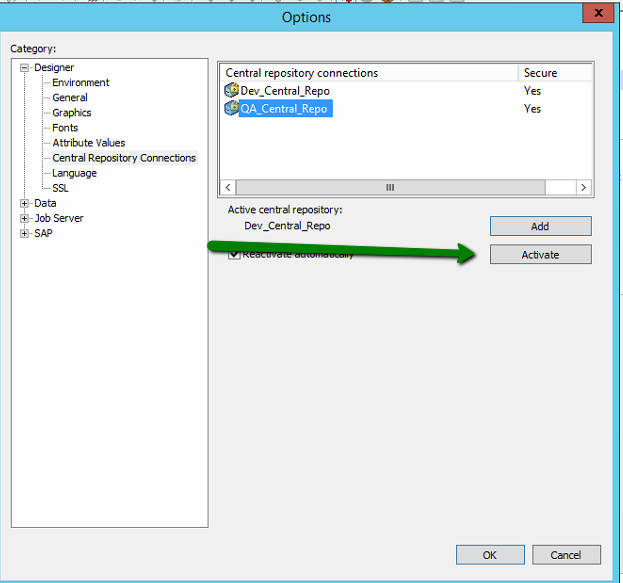
This display the list of currently assigned central repositories, currently none. We thus press the Add button in order to add a new Central repository as indicated below.
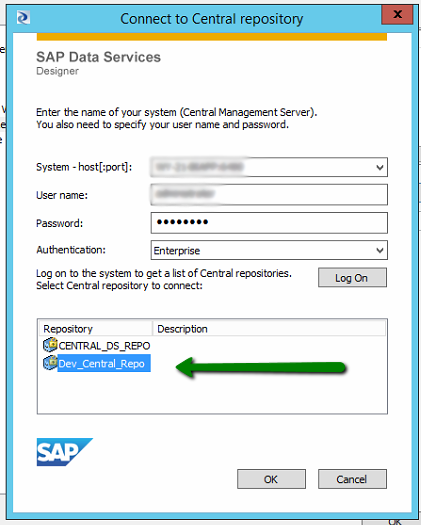
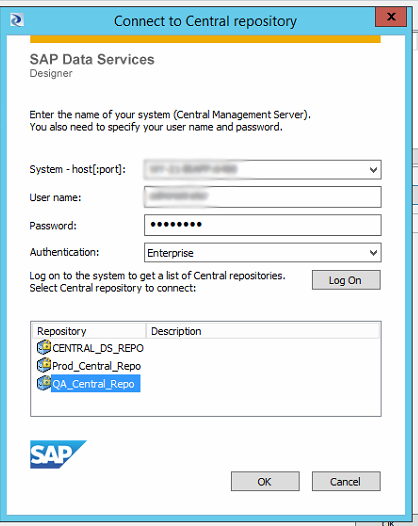
This invokes the following dialog box again which upon logging in will detail the central repositories that are available to you. In this instance I want to obtain the latest development release code which will of course be located within the ‘Dev_Central_Repo’, we thus select the repo as indicated and press ‘OK’
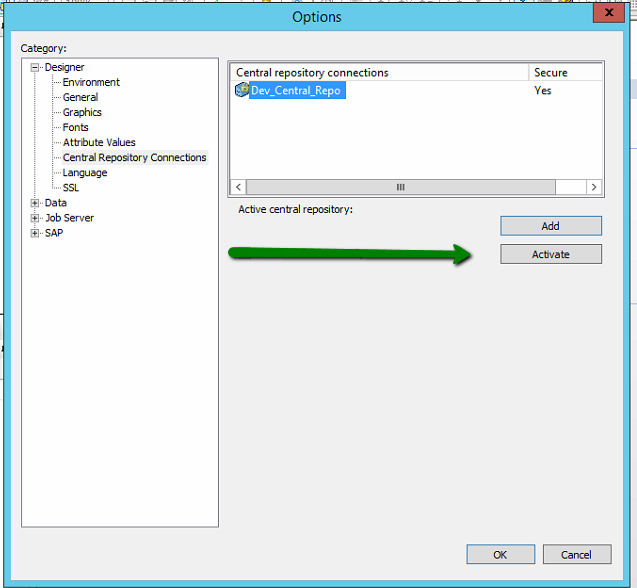
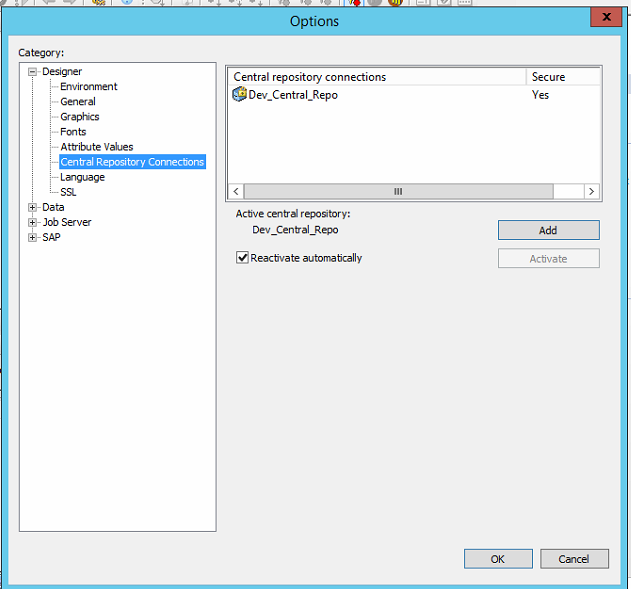
Once control returns to the ‘Central Repositories’ window all being well your development repository should now be within the list. We now need to ‘Activate’ this repository, which permissions allowing will allow us to interact with this repository. You may have only one active central repository at one time.
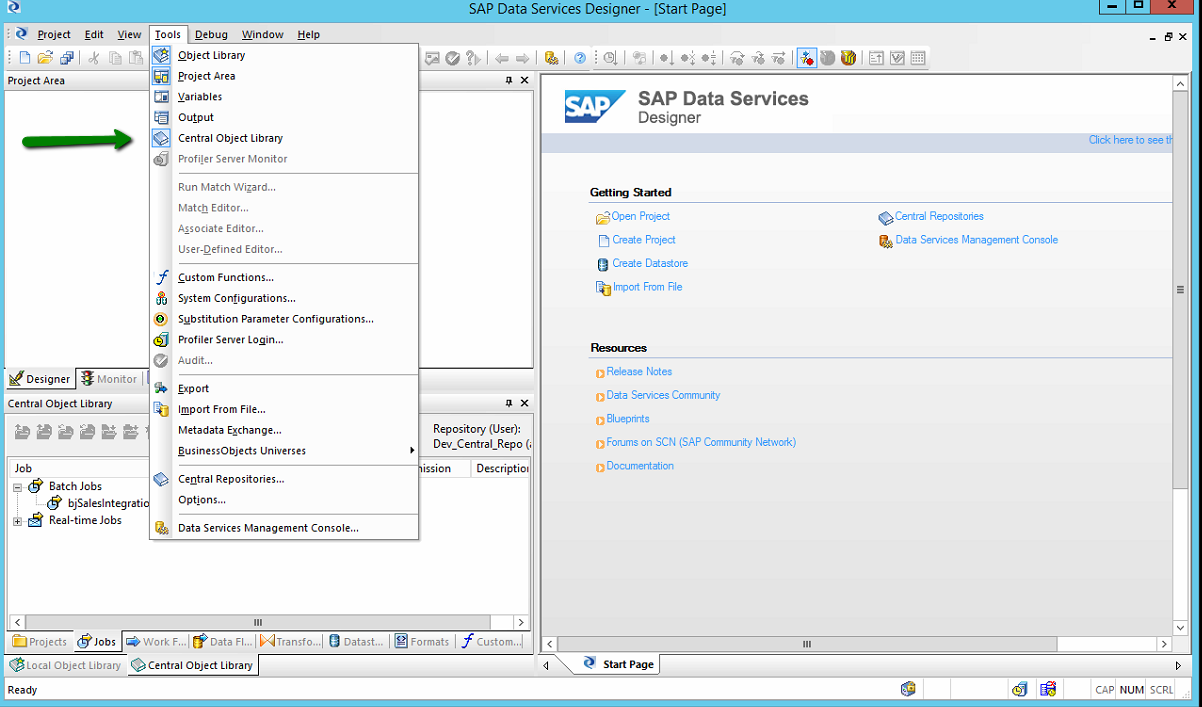
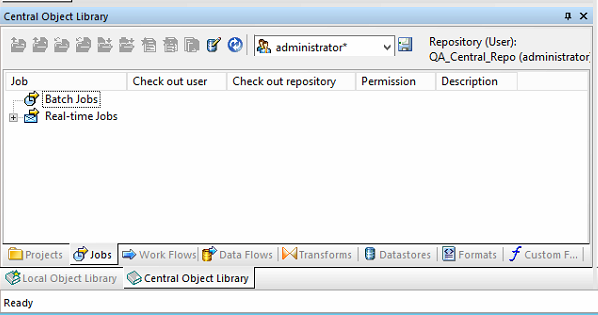
Once the dialog is dismissed in order to see the new active central repository we will need to show the ‘Central Object Library’ window available from the ‘Tools’ menu
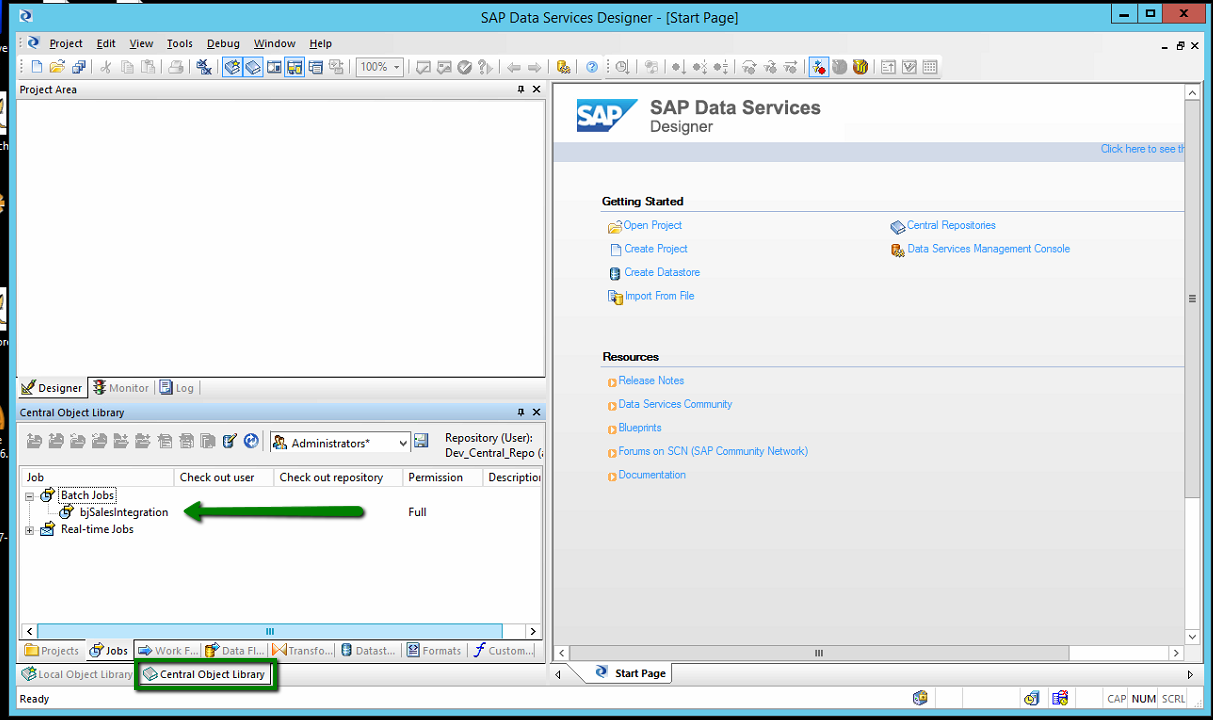
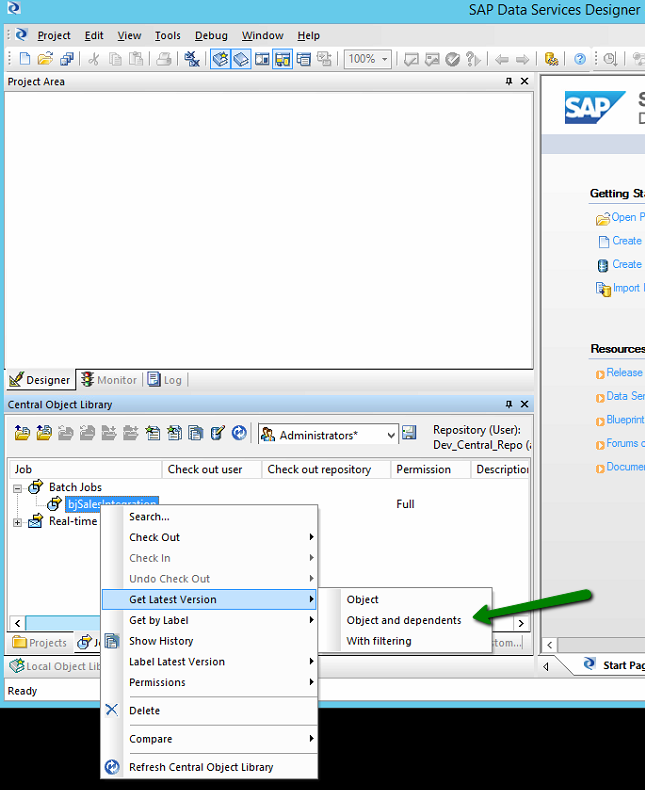
Upon showing and docking the ‘Central Object Library’ your screen should look a little like this, note that we can see the batch job that has been built for testing in this instance called bjSalesIntegration.
Central Repositories cannot be worked on or executed at all and so what we will need to do is to pull the source down into our local repository, this is achieved by right clicking on the appropriate job and selecting the ‘Get Latest Version’ (OR ‘Get By Label’ where you have been asked to use a specific release), a sub menu will then be provided for which you will need to select ‘Objects and Dependants’. This will download the job you have requested along with ALL dependant objects, data sources, etc.
Once the download has finished processing you should be able to switch back to you local repository and see that the Job you elected to download has been copied into your local repository.

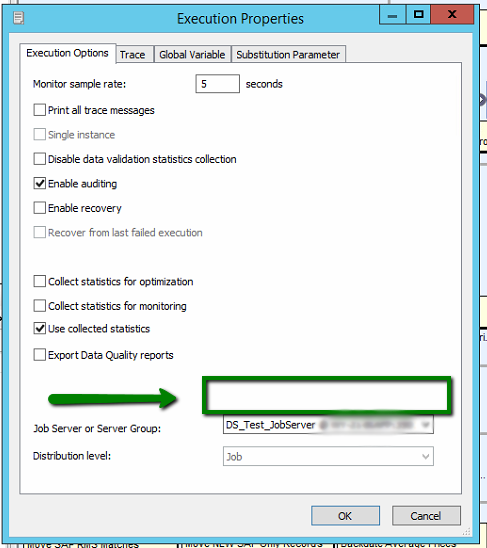
Upon opening the job you should see the workflow as defined by the developers, if you then elect to run the transformation you should notice (as with the following dialog) that we do not appear to have any system configurations available which is odd…. There are two reasons for this:-
- Substitution Parameters are not exported via the Central Repository synchronisations
- System Configurations are also not exported via the Central Repository
Please review these (up and coming) blog posts for details of how to export Substitution Parameters and System Configurations.
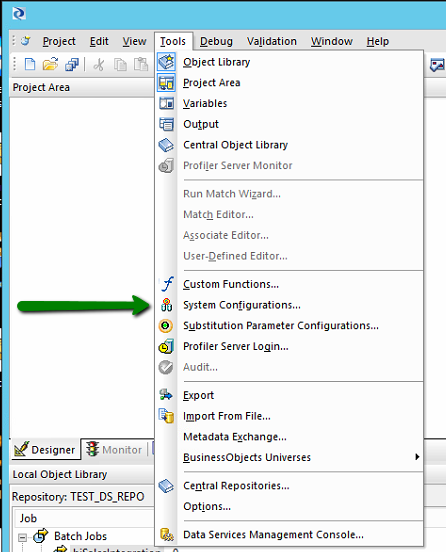
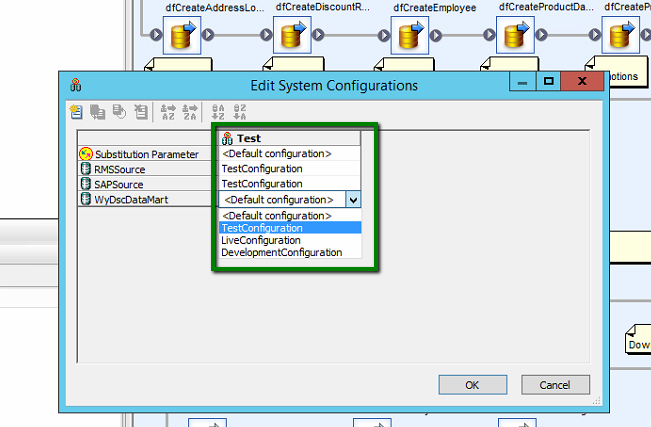
Once you have System configurations available to you (after reading the aforementioned blog posts) we need to configure them thus, select the ‘System Configurations’ menu item available from the Tools menu.
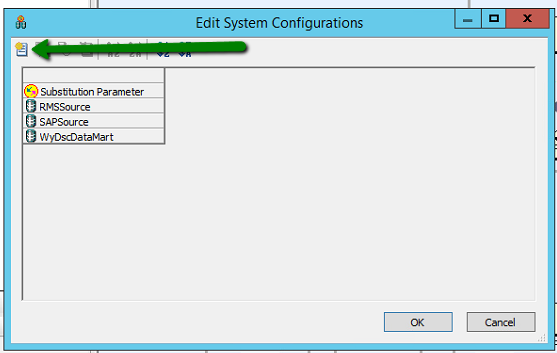
You should then see the following dialog displayed, this details the configured data sources and substitution parameters that can be configured, as you can see though in this instance there are no configurations selected. In order to create one you need to press the indicated toolbar item
I am going to create a ‘Test’ configuration. This will detail the data sources and substitution parameters that are to be utilised whenever I elect to run this ‘Test’ configuration. As you can see I have elected to utilise the ‘Default’ substitution parameter configuration and for each of the the three data sources i wish to use the ‘TestConfiguration’ which will likely point at a test version of the specified database.
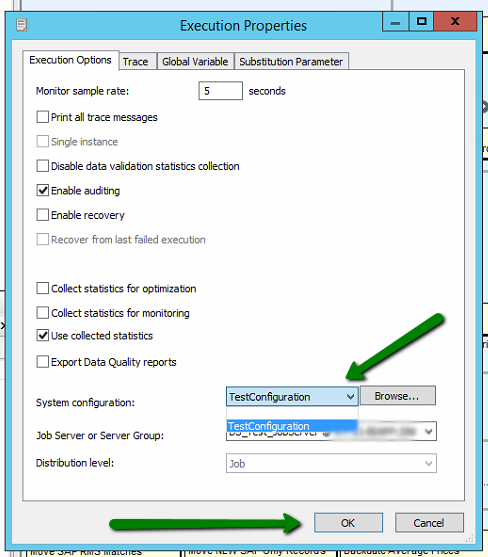
Once these details have been saved upon electing to run the job again the following dialog will be displayed, note how we NOW have a system configuration dropdown from which we can select the configuration that we wish to use when executing the ETL package. This can in turn determine exactly how the package is being run, against which data sources and into which destination are the results to be persisted.
Once the QA department are totally happy with the release made by the development team they will likely want to make a release of this available to the production team. Looking at the flow diagram at the start of this article you can see that the QA team will thus want to move the job into the QA repository so that the production team can subsequently download the job into the live execution repository and run in production. The QA team thus need to deploy the source into the QA central repository which as we can see they do not currently have assigned as a central repository. They this need to press the ‘Add’ button below
This will prompt them for their logo on credentials, this will bring up a list of the repositories that they can see. In this case they wish to connect to the QA Central Repository and so they select this one and press OK.
Once you have added the repository you should be returned to the Central Repositories dialog, you will then need to select the QA Central Repository and press ‘Activate’. Please note that ONLY one central repository can be active at one time (life’s tough enough without added complications right?)
Once you reopen the Central Repository window you should now see that we are now looking at the QA_Central_Repo and as you can see there are currently no batch jobs contained, this is exactly what we expect to see.
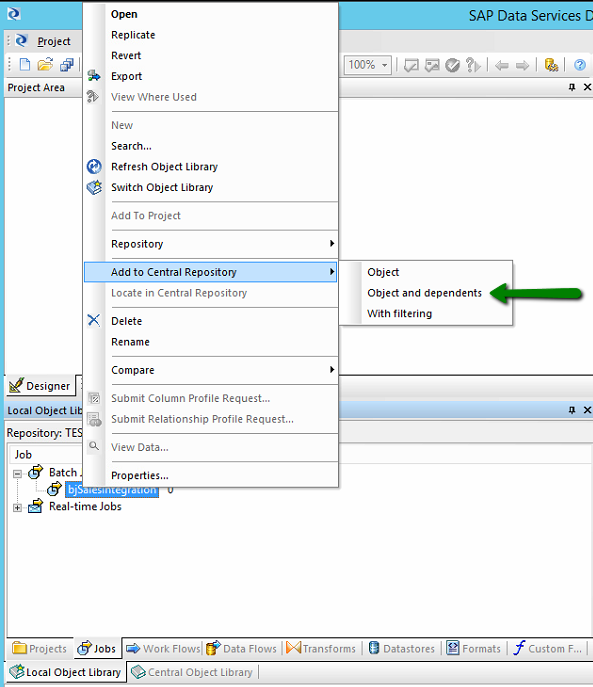
Switching back to our local test users repository we can then right click on the job and select ‘Add to Central Repository’, this gives us a few options; in this instance we want to add the object specified AND all of the dependent objects (that would be all of the underlying data flows and data sources etc).
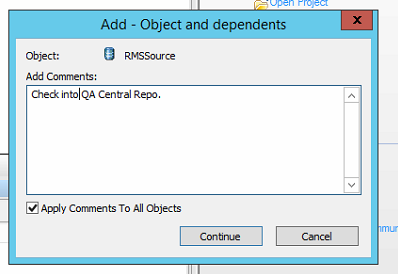
In typical with many source control providers you are then asked for any comments to help you identify the changes are new to this release. It is GOOD practice to write something sensible here not just ‘Changes for next version’ which 12 months down the line will mean nothing at all!
And thats it, your source is now available for the Production staff to download in exactly the same way that the QA team downloaded in this blog. There is of course a lot more to source control systems than just adding and getting files but this should do to get you started in the world of ETL software release cycles.